


Post by KashKey on Mar 6, 2022 15:16:04 GMT -8
0 total points to distribute
| Discipline | Stat Pts | MOD |
| STR | 20 | +5 |
| DEX | 16 | +3 |
| CON | 16 | +3 |
| INT | 14 | +2 |
| WIS | 16 | +3 |
| CHA | 2 | -4 |
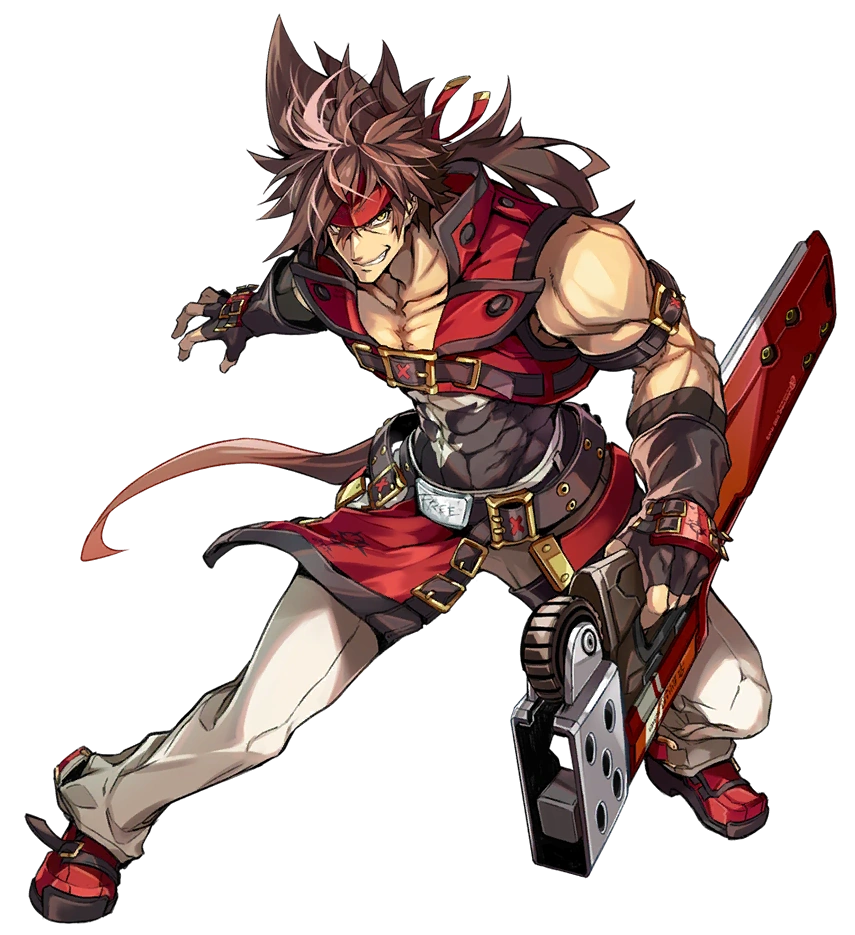
Sol Badguy
Earth/Guilty Gear
Alignment: Chaotic Good
Motto: "You rely too much on power, you'll always run into a bigger badder wall. I'd suggest polishing other strengths. What, me? Yeah, I don't do that shit..."
Allies/Friends: Ky Kiske, Dizzy Kiske, Sin Kiske, Jack-O, Leo Whitefang, Axl Low, Ramlethal Valentine, Elphelt Valentine, Dr. Paradigm
Enemies/Rivals: Ky Kiske, That Man, I-No, Raven, Zato-ONE, Testament, Robo Ky, Venom
Backstory: guiltygear.fandom.com/wiki/Sol_Badguy
Appearance
History On Li: Sol is, admittedly, not sure how he arrived on the planet. He suspects it has something to do with the Backyard's interference, but the exact details are beyond him. As a result, he is forced to simply accept the reality of his situation... He's stuck. As a result, he's made an odd decision.
At his heart, Sol Badguy is still the scientist Frederick Bolsara. Despite the name he uses, he's more than happy to rely on those skills. As such, unlike most of the scientists here dedicated to simply keeping the Life Sphere alive, he's elected to follow up and see how much research into the phenomena of the planet, and more importantly... Find a way off this godforsaken rock.
Primary Attacks (3)
Brute Force: Sol Badguy is not in fact a trained combatant. Hell, one could argue he has no idea what he's doing in the slightest. This is the embodiment of that: Sol punches, kicks, or slashes with Junkyard Dog MK II in any way he damn well pleases. [STR 8%]
Bandit Revolver: Sol flies towards his opponent, slamming his knee into their jaw before whirling around into a kick as he comes down to the earth. A simple move that he can't use too often, less it be punished, but certainly effective. [STR 18%]
Fafnir: Covering the Junkyard Dog MKII in flame, Sol drives his blade forward to slam it into his foe as hard as he can. The true point of this attack, however, isn't merely to do damage. It's to break guards. Should someone block Fafnir with their bubble shield, it will take 1.5x more damage than typical. This has a 3 turn cooldown. [STR 24%]
Special Attacks (4)
GUTS: Sol has absolutely no patience, but if there's one thing he has less of, it's drive. Despite being extremely powerful, (far beyond that of most fighters, to the point his stats have gone beyond the typical cap,) Sol has absolutely no desire to put his full effort into a fight, to the point that he actively loathes it. At the start of a mission, Sol has all modifiers reduced by 6, as he actively holds back from unleashing his full strength. But as the fight drags on and he takes more damage, he loses his patience. Every 18% of damage he takes, his penalty on his stat modifiers is reduced by 1 as he puts more effort into the fight, gritting his teeth and fighting on as he loses his cool. This cannot have an inverse efect, however. Once the penalty is reduced to 0, Sol is officially putting his full strength into the fight, and going all out. This allows him to unleash the obscene strength granted to him as a Gear.
Tyrant Rave ver.β: Tyrant Rave is not an ability Sol can use at the start of a fight. This is where Tyrant Rave comes in. At 50% tension, Tyrant Rave can be used once. This spends 50% of his accumulated Tension, as he proceeds to slam his fit into his foe, before slamming a fireball the size of his body into them. This does massive amounts of damage, and cannot generate Tension. Furthermore, it has a 3 turn cooldown, meaning he cannot use Tyrant Rave, then use Tyrant Rave again if he has 100% Tension. [STR 40%. Costs 50 Tension. 3 turn cooldown.]
Tension: Every time Sol hits someone, or gets hit, he accumulates Tension. For every percent of damage he does, he receives .75 times that amount. For every point of damage he takes, he receives .5 times that amount. This can be gathered up to 100%, at which point he is unable to gain more, and it must be spent if he wants more Tension. On its own, Tension is worthless, it is its interaction with other moves in his kit that provides its utility.
Dragon Install: Costing 50 Tension, Dragon Install allows Sol to unleash the power of the Blood of Juno, and reveal his monster like form as a GEAR. This is a temporary buff that gives him +2 to his Strength and Dex modifiers for 2 turns, while boosting the rate at which he gains tension to x2 when he attacks, and 1.5 when he gets hit. And, as if that wasn't enough, all attacks made deal an extra 10%. However, the drawback is nasty. As soon as Dragon Install ends, Sol will be instantly placed into stun. For an entire turn all attacks directed at Sol will automatically hit, he will be unable to attack, and ALL Tension accumulated while in Dragon Install will be automatically lost. On top of that, it has a whopping 4 turn cooldown to boot, which only starts once Dragon Install ends. This is a move of last resort. Furthermore, the modifier penalty from GUTS will still apply to Dragon Install. If his Dex modifier is currently at -3, he will only be able to roll with a modifier of -1.
Final Smash (1)
Branding Breach
Sol's Final Smash is best described as magic infused brutality. Showing the Fire Seal sword hidden inside, Junkyard Dog MKII opens its gaping maw, as magical runes begin to line the Fire Seal, allowing Sol to charge his attack. Once charged, Sol rushes forward, slamming the blade into both the ground and his opponent, as flame bursts forth through their body... Before condensing into the ground, and unleashing a massive explosion. The size and damage of this attack is augmented by how much Tension Sol has at the time of its use. At 0% Tension, it does a mere 40%. At 25% Tension, Sol's strike does 50% damage. At 50% it does 60%, and the size of the explosion is increased by 50%. At 75% Tension, Sol does 70% of damage to a single target, and 10% of blowback damage to himself. At 100% Tension, Sol does 80% of damage to a single target, and 20% of blowback damage to himself. All Tension currently acquired is spent when the move is used.
Other Info: I'm sorry.
Last Edit:
Apr 30, 2022 10:18:28 GMT -8 by KashKey


